How Can We Help?
How to upload snapshots to your FTP sever?
You may follow the steps below to set up FTP:
Note: For uploading snapshots taken by smart functions (such as Face Capture, Cross Line and Intrusion, etc.), please refer to Smart FTP configuration.
General FTP configuration
- Click Setup > Storage > FTP > General.
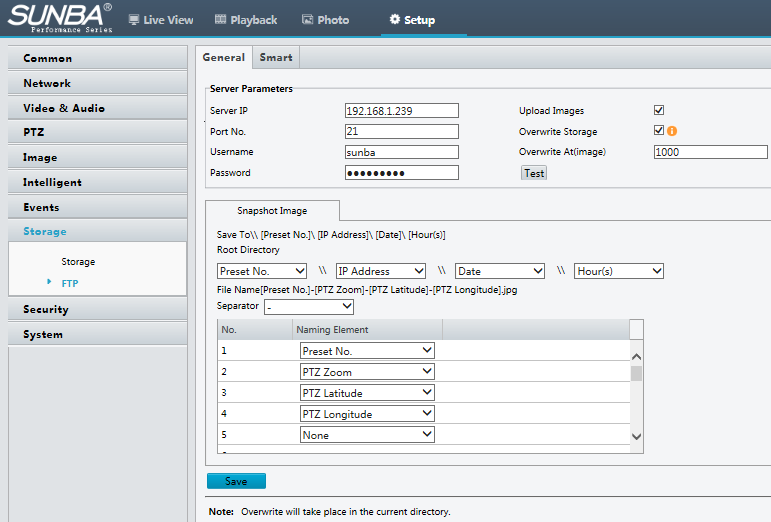
- Set the IP address and port for the FTP server, username and password used to upload images to the FTP server, select Upload Images, Overwrite Storage and set Overwrite At (threshold for overwriting images). Then you may test FTP after completing FTP settings correctly.
Note: ①The FTP server must be in numeric format (IP) and doesn’t support domain as input. ②The password of FTP doesn’t support special characters.
3. Set the path for saving snapshots on the FTP server and the file name format. For example, set path as Preset No.\\IP Address\\Date\\Hour(s), and set file name as Preset No.-PTZ Zoom-PTZ Latitude-PTZ Longitude.jpg.
4. Click Save.
Smart FTP configuration
- Click Setup > Storage > FTP > Smart.
2. Set the IP address and port for the FTP server, username and password used to upload images to the FTP server, select Upload Images, Overwrite Storage and set Overwrite At (threshold for overwriting images). Then you may test FTP after completing FTP settings correctly.
Note: ①The FTP server must be in numeric format (IP) and doesn’t support domain as input. ②The password of FTP doesn’t support special characters.
3. Set the path for saving snapshots on the FTP server and the file name format. For example, set path as Preset No.\\IP Address\\Date\\Hour(s), and set file name as Preset No.-PTZ Zoom-PTZ Latitude-PTZ Longitude.jpg.
4. Click Save.
Smart FTP configuration
- Click Setup > Storage > FTP > Smart.
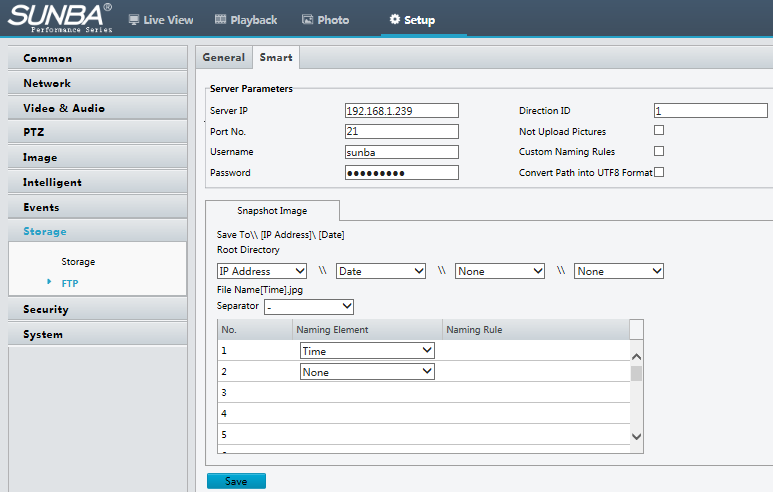
2. Set the IP address and port of the FTP server, username and password used to upload images to the FTP server.
3. Set the path for saving snapshots on the FTP server and the file name format. For example, set path as IP Address\\Date, and set file name as Time.jpg.
4. Click Save.